Cranberry Orchids by Marge Bennett
The second in a series of “How did you do that?” Posts.
The three monoprints shown above are made with the same print process as the mums in the Imagined Garden Piece. Squish Part 1
The small square here is a detail of the center flower. Note the texture. Only one color was used for these flowers. The stems and leaves were done in the same fashion using a green watercolor mix.
Since they are more complex, the orchids were created in small sections
How it was done:
First create an outline drawing of the image you wish to print.
Place the flexible celluloid plate over a small portion of the drawing (smooth side up).
Use a washable marker to trace that part of the drawing on your plate.
Turn the plate over and cover the image with soft, wet paint.
Squish the plate on the paper in the selected spot and create as much distortion as you desire. (Pressure and direction of push gives some control.)
Lift the plate by one corner and pull up so as to create texture.
Wash the plate and repeat the process again and again until the image is complete.
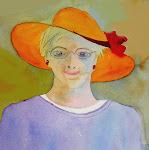
Obviously the images created will be fanciful. Squish painters are not doing botanical illustration! The process can be used to make prints or the images can be integrated into paintings as in Growing Old Gracefully shown below


That was interesting. I just wanted to add that I like the Growing Old Gracefully painting. It is so interesting. None of the flowers look the same and there are so many textures there. The negative space in the clearing is so nice.
ReplyDeleteThanks, Kim, what a nice critique. The painting has a new home but I did so enjoy this one. Marge
ReplyDeleteThank you for the step-by-step lesson, Marge! I will have to consider squishing in the future. And I'll have to second Kim's thoughts on the Growing Old Gracefully painting!
ReplyDelete